-
Posts
7,282 -
Joined
-
Last visited
-
Days Won
2,416
Content Type
Forums
Blogs
Events
Resources
Downloads
Gallery
Store
Everything posted by allheart55 Cindy E
-
Sea
-

Five Letter Word Game
allheart55 Cindy E replied to allheart55 Cindy E's topic in Tech Help and Discussions
The vagus nerve is one of twelve cranial nerves. -
-
Cellar
-

How to clean install Windows 10
allheart55 Cindy E posted a topic in Microsoft Support & Discussions
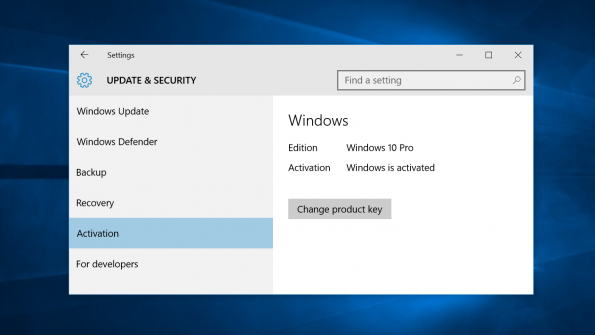
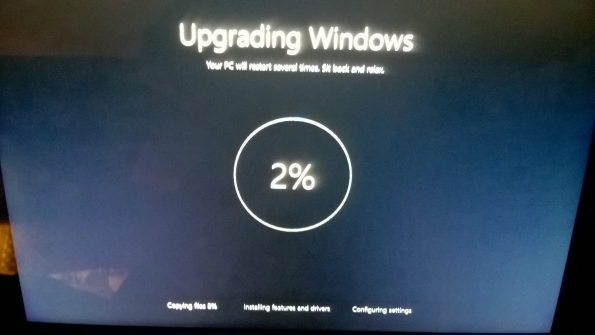
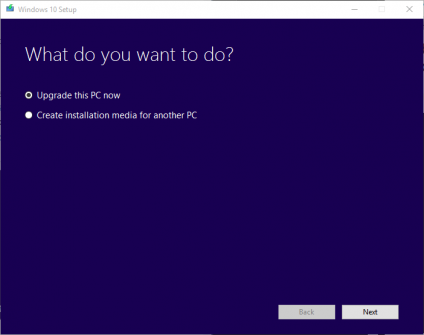
Windows 10 has been available for a couple of days, and 14 million machines have already been upgraded. If you're anything like me and you have a custom PC or you just want a nice and clean install of Windows then you'll want to format and start over. Microsoft hasn't been exactly clear about that process, but I've spent the past couple of days figuring out what does and doesn't work. If you want to learn more about the operating system then read our Windows 10 review here. How to clean install Windows 10 If you're on Windows 7 or Windows 8.1 Warning: this guide is designed for the technically minded, so if you just want to upgrade to Windows 10 then please follow the usual process here. First things first, backup everything you want to keep on your PC. You'll need to upgrade to Windows 10 first before a clean install. This is the safest way to ensure Windows 10 recognizes your product key and upgrades you correctly. You can chance clean installing without the upgrade path, but Microsoft does warn it might not be able to detect the product key from your PC's motherboard. That means upgrading the supported way, and not with an ISO. There are two ways to do this officially and retain your license and activation properly. The first is using the usual reservation method detailed here, but skip that and use Microsoft's method to bypass the line. Visit Microsoft's Windows 10 download page and select the 32-bit or 64-bit installer that's relevant to your current operating system. Once the tool opens you'll have two options: upgrade this PC now or create installation media for another PC. Select upgrade this PC and follow the prompts. Once you're on Windows 10, ensure that you login with your Microsoft Account you intend to use. Check that your PC is activated and check the copy of Windows 10 you have installed from Settings > Update & Security> Activation. Write down the exact copy of Windows 10 you have installed, and then download the Windows 10 installer again on your machine and this time select the second option: create installation media for another PC. You'll need a USB key that's at least 3GB in size or the ability to burn an ISO file to a DVD later. When you pick the version of Windows 10 ensure that it matches the version you noted down after the upgrade. Once your USB key or DVD is ready, reboot and use the BIOS options on your PC to boot from the USB or DVD. There will be a variety of setup prompts, but ensure you choose the custom installation to format your existing partition. Ignore any product key prompts along the way by selecting the skip option. Once you've installed Windows 10 it should automatically activate, but if it doesn't then you can run slmgr.vbs /ato from a command prompt to initiate activation. If you're already on a Windows 10 preview machine If you've been testing Windows 10 and now you want to clean install it on your machine, things get a little tricky. First things first, backup everything you want to keep on your PC. To be 100 percent sure you'll retain your product key you'll need to restore your PC back to Windows 8.1 or Windows 7 and then perform the upgrade process detailed above. You can restore your PC using the DVD your PC maker supplied with your PC, or attempting the reset PC process on your machine. This may have been overwritten by Windows 10, so if you're not able to restore then contact your PC maker. You can try going for a clean install using the ISO, but it's not guaranteed to work unless you've officially upgraded that machine to the final version of Windows 10 from a Windows 7 or Windows 8.1 install. I tried clean installing and I lost activation, but restoring to a Windows 8.1 install to upgrade to Windows 10 and then format and clean install worked. It's a little messy for Windows 10 testers, but it's the guaranteed way to ensure you don't lose activation. Source : theverge-
- clean install
- custom
-
(and 3 more)
Tagged with:
-
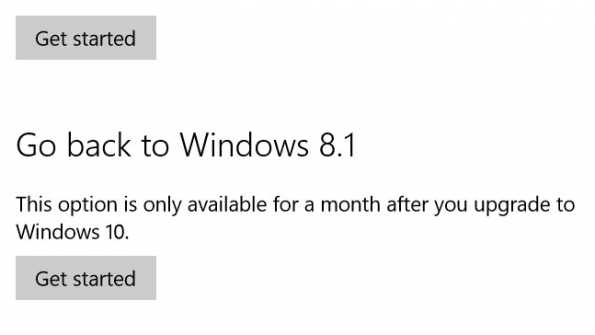
Let's face it - Windows 10 may not be for everyone. It might be incompatible software, hardware or any other number of things that is not liked but bottom line is they want to go back to the operating system they upgraded from. Well that is easy enough to do in Windows 10 and you have up to 30 days to make the decision to revert back to your former OS. Once those 30 days are up then you will be forced to reinstall your old OS from scratch. Here is how you revert to the previously installed OS. 1. Go to Settings>Update &security>Recovery. 2. Look for the Go back to Windows XX entry which will say either 7 or 8.1 depending on your former OS. 3. Click on Get started and follow the prompts to go through the restoral process. Once it is complete you will find yourself in the familiar confines of your past operating system. Take note - if you previously cleaned up after your Windows 10 install by using the Disk Cleanup tool and removed the old Windows installation files this option will not be available. Source : winsupersite
-
- 30 days
- incompatible
-
(and 2 more)
Tagged with:
-
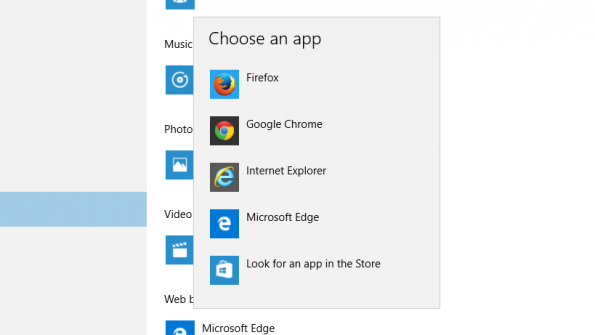
You would think changing the default browser in Windows 10 was near impossible with all the discussion around it over the last couple of days. However, in reality it is amazingly easy to change the default web browser in Windows 10 and it takes less than 45 seconds and just five steps to accomplish. Note: You need to install your browser of choice prior to following this process so it is available as an option. Lets get started: First click the Start Button in the lower left corner of your main Windows screen (or press the Start Key on your keyboard then type/search for default browser (1). Next you will see an entry at the top of the Start Menu that says Choose a default web browser (2). Click that entry to continue. That will open up the Settings>System>Default apps area with the Web browser option selected. Click on that entry to continue. In the resulting pop up menu just click on your preferred browser. Once you have selected your preferred browser it will now show as the default. Just close the window and you are done. From this point forward any clicks on web links in apps or programs will result in your browser of choice opening up. Source : winsupersite
-
- default browser
- option
-
(and 2 more)
Tagged with:
-
-
Motherboard
-

Here's what's next for Windows 10
allheart55 Cindy E replied to allheart55 Cindy E's topic in Tech Help and Discussions
It's not actually a service pack, it's called a service release but I get your point and agree with you.- 7 replies
-
- feature additions
- fixes
-
(and 5 more)
Tagged with:
-
Windows 10 resolves a lot of the annoyances left over from Windows 8, but it also comes with a few of its own—little as most of them may be. Here’s how to tweak a few of the OS’s new features and fix its little quirks. Personally, I’m really enjoying Windows 10. I upgraded my desktop from Windows 8.1 and my laptop from Windows 7 and both went off without a hitch. Most of the lingering little problems I lived with in Windows 8 have been resolved. Of course, like with any OS, there are just a few things that could use fixing. Fix Up Your New Start Menu The Start menu became one of the more divisive issues for Windows 8, which removed it entirely in favor of the Modern UI Start screen. Some people loved the new interface; many hated it. Microsoft brought the menu back in Windows 8.1 and has revamped it for Windows 10. And it’s...pretty good. The Start menu works much more fluidly in Windows 10. It’s fast, all your apps are present on the menu, and search is really good. Still, for many, the new live tile presentation in the right column of the Start menu is pointless. For me, I don’t really use any modern apps, so it’s just wasted space for the most part and I suspect a lot of people feel the same way. Fortunately, most of the classic Start menu apps for Windows 8 work just fine for Windows 10. Start8, our favorite app, has been updated to Start10 (though unfortunately, it’s a paid upgrade). If you prefer free, Classic Shell still works beautifully. If you prefer your Start menu with the functionality of the Windows 7 Start menu, any of these apps can get you back to it. And don’t worry. The new search functionality will still work. If you don’t want to use an extra app, there are still a few things you can do to tweak your Windows 10 Start menu to your liking: Adjust the size of the live tile area by dragging the right edge of the Start menu while it’s open. You can make up to four columns wide. You can also drag the top edge to resize the whole menu. Make the Start menu full screen by going to Settings > Personalization >Start and turning on the Use Start full screen switch. This is much like using the Windows 8 Start screen. Right-click any live tile and choose Turn live tile off to make it a regular tile. Unpin all the tiles on the right side of the Start menu (right-click and choose Unpin from Start) to make a single column Start menu with no live tiles. With the right tweaks, there’s no reason you can’t fall in love with the new Start menu. Change Your Default File Associations During the Windows 10 upgrade, a lot of my default programs got reset even though I told Windows not to do it. For example, it went ahead and associated all picture files with the built-in Photos app even though I removed that check box during installation. It’s easy enough to fix, but it is an inconvenience. If you find your default programs have been changed you can change them in a couple of ways: Change the default program for a single extension on the fly. Right-click a file, point to Open With, and click Choose another app. This lets you choose an app to open that file. Select the Always use this app option to permanently associate the program with the extension. Change a program to open some or all available extensions. In the search box, find and open Default Programs. This opens the window shown above. Pick a program on the left to see its current associations. You can set the program as the default for all file types it can open or choose specific file types and protocols with which to associate the program. Remove the Search Bar and Task View Button From the Taskbar The new search bar on the Windows taskbar can be pretty handy, but it takes up a good bit of real estate on the taskbar. Plus, you can search just as well without it. Even with the search bar hidden, you can hit your Windows key and start typing to perform the same search. To hide the search bar, right-click anywhere on the taskbar and point to Search (or, if you’ve enabled Cortana, Cortana). Choose Show Search Icon (or Show Cortana Icon) to remove the search box itself and just show an icon you can click to open up Cortana, or choose Hidden to remove them from the taskbar entirely. On that same Taskbar context menu, deselect the Show Task View button option to remove that button from the taskbar. You can still get the same Task View by hitting Windows+Tab. Remove “Quick Access” From File Explorer Quick Access is the new area in File Explorer that replaces the Favorites section from Windows 8. The video above, from Windows Central, is a pretty good rundown of the feature. Quick Access can actually be pretty handy, and may not seem like an annoyance to some, but if you’d rather not see all your most recently used folders cluttering up Explorer, you have a few options. First, you can change the default File Explorer view from Quick Access to This PC. Just open File Explorer and head to View > Options, and under the General tab, change “Open File Explorer to” to This PC. Handy! If you want to get rid of Quick Access entirely, the process is a bit more complicated. You can read about in full over on Windows Central. It does take several steps, a couple of which require you to make registry changes, so, if it’s not bugging you that much, you may not want to bother. If you’d like to banish Quick Access, though, create a system restore point or make a quick backup of your registry, and go for it. Change the Boring Title Bar Colors While Windows 10 does not let you change the default color of the title bar for windows from their default white, you can change them with a little mild hackery. As Into Windows points out (and hit up that link for the full instructions), all you have to do is make some text edits to a couple of styles files so that Windows uses the accent color (a value you can change) for the title bar. After you make the edits, you can change the accent color any time you want to change your title bar color. Do do this, just open Personalization > Colors, turn off the Automatically pick an accent color from my background option, and choose any color you like. Disable Windows 10 Updates Windows 10 automatically downloads and installs updates without any input from you. Overall, this is likely a good thing, given how many people out there are bad at keeping things updated. This policy can cause trouble, though, especially if Windows downloads driver updates that end up causing you trouble. If you’d rather have control over what updates get installed, you can prevent specific updates from installing using a process reported by Gizmodo. The downside is that it’s a pretty hacky workaround. You’ll have to download a troubleshooting tool from Microsoft that lets you view and hide pending updates. Once hidden, Windows won’t automatically install those updates until you unhide them. Source : http://lifehacker.com/how-to-tweak-windows-10-and-fix-its-minor-annoyances-1720989970
- 1 reply
-
- apps
- classic start
-
(and 4 more)
Tagged with:
-

Five Letter Word Game
allheart55 Cindy E replied to allheart55 Cindy E's topic in Tech Help and Discussions
That's just great if you have a taste for dragon meat. -
Windows 10 is now available as a free upgrade for Windows 7 and Windows 8.1 users. While millions are performing the upgrade this week, Microsoft is working hard on updates and fixes behind the scenes. Some of those patches have already started rolling out, but there are more to come. The first bigger collection of fixes will come with what Microsoft calls Service Release 1 (SR1). Sources familiar with Microsoft's plans tell The Verge that SR1 is due to be released in early August, possibly as early as next week. While SR1 won't include new features, it will fix some of the issues people have been experiencing with Windows 10. After the initial patches and updates, Microsoft is working toward a bigger collection of fixes and feature additions for later this year. Tentatively scheduled for October, some of those additions will include a new Messaging app to provide Skype integration and extensions support for the Microsoft Edge browser. "There's no one working on a Windows 11, but there's a group of people working on some really cool updates to Windows 10 that the Windows insiders will see soon," says Microsoft's Windows chief Terry Myerson in an interview with The Verge. Windows 10 testers will start to receive new builds shortly, with the ability to test new features like Microsoft Edge extension support before it's available more broadly later this year. Windows 10 testers will see Microsoft Edge extensions soon. Speaking to The Verge last week, Microsoft Edge program manager Drew DeBruyne revealed a little more about how extensions will work in Microsoft Edge. Extensions will be javascript-based, and Microsoft is trying to mimic exactly how Chrome extensions work so it's easy for developers to port them across. In the screenshot above you can see how a Pinterest extension is integrated in a similar way to Chrome. "The intention is that there’s not much work to do, or zero work to do," explains DeBruyne. "We’re doing a lot of work to essentially support the same APIs that Chrome does." Extensions will be hosted in the Windows Store alongside regular apps, and developers will be able to sideload them. Microsoft's dedicated Messaging app for Windows 10 will enter preview in the coming weeks. The messaging app will bring Skype integration directly into Windows 10, creating a more iMessaging- and FaceTime-like service. Microsoft is planning to release this to Windows 10 users later this year, but insiders will get to test it very soon. You'll be able to make video and audio calls all without a dedicated Skype app, and Skype messaging will be supported through the built-in Messaging app. Outside of features and app updates, Microsoft is also working on the basics. Windows 10 battery life isn't exactly where the company wants it to be. "We are ... I want to be able to say it's the best battery life, but right now we're about equal to Windows 8.1 updates," explains Myerson. "We're pushing for some fixes to say we're better. Still, 8.1 update had very good battery life, so we're in no way stepping back." Further out, Microsoft is also working on a "redstone" wave of releases for Windows 10 that will add more features in 2016. While existing built-in app updates will roll out regularly over the coming months, redstone may introduce new apps as part of two summer and fall updates due next year. The big push of Windows as a service continues. Source : theverge
- 7 replies
-
- feature additions
- fixes
-
(and 5 more)
Tagged with:
-

Five Letter Word Game
allheart55 Cindy E replied to allheart55 Cindy E's topic in Tech Help and Discussions
I'll have to try the dragon meat later, much later. :eek::D -
-
Group
-
Upgrade your Windows 7 and 8.1 systems to Windows 10 first so that your activation is taken care of. Clean installs can follow afterwards if necessary. ----- It has been a whirlwind 36 hours or so as Microsoft began rolling out Windows 10 in time zones around the world as they hit midnight on 29 July 2015. It reminded me of New Years Eve and how they show footage from those countries as midnight strikes with the fireworks and other events. Social media was like that on Windows 10 Eve as I sat at my computer prepping for the launch here from my home base on the North East coast of Florida. Once midnight arrived here that seemed to be Redmond’s trigger and they released all of the paraphernalia and content relating to Windows 10 from their hidden coffers. Prior to 29 July our understanding of the Windows 10 roll out was that it would be a staggered approach with Windows Insiders receiving the update first and then those with reservations getting the upgrade in the following days. Ultimately, it would be made available to everyone using Windows 7 and 8.1 whether they ever made a reservation or not. Well instead of all that Microsoft went ahead and made a tool available to create Windows 10 installation media that allowed anyone to do an in place upgrade to Windows 10 or create an installation USB drive for use on other computers. That literally opened the floodgates and a lot of individuals began the upgrade process. Along the Windows 10 development path one area that we have had very vague info is the activation process when we upgrade those Windows 7 and 8.1 devices with the free Windows 10 upgrade. Everyone seems to be asking where is my product key for the upgrade? because that is how we did it with past versions of Windows. Well this is another area that Windows 10 is changing when it comes to the way we look and use Windows. We already know that the new concept of Windows as a Service (WaaS) with the steady flow of new features and fixes is different than the old process of releasing big Service Packs every year. We have also heard a lot about the the pros and cons of mandatory updates for Windows 10 Home users. Then when it comes to installing Windows we have all believed the only way to upgrade from one operating system to another is through a clean install process. Well with Windows 10 this is also changing and I want to focus on that for the remainder of this article. We have no doubt spent a lot of time talking about the various scenarios around upgrading your current Windows installation to Windows 10. Our comments are full of questions from you about these situations and you want to understand how it all works – we all do. While we have tried to answer every possible variation you have asked about I want to step this conversation down to generics about Windows 10 installs and upgrades. All of the information to follow is based on what I have learned over the last couple of days in performing my own upgrades from Windows 7 and 8.1 to Windows 10 and talking with other industry experts. First – if you are not on Windows 7 (with SP1) or Windows 8.1 there is no free upgrade option to Windows 10. Second – you must be upgrading to the same edition (Home/Pro) and architecture (32/64 bit) that matches the Windows 7 (SP1) or 8.1 system you are updating. Third – Backup your data before attempting any upgrades because you never want to discover you do not have a backup when you actually need one. Fourth – the process I am detailing below is for consumer versions of Windows (both retail and OEM). Volume Licensing customers have their own keys that are used to activate their upgrades to Windows 10. The process below has worked for me on a Windows 7 desktop (home built) and a Windows 8.1 laptop (HP Spectre x360). The key step in each of these installations was that I did an in place upgrade to Windows 10 first. This is because Microsoft is handling the activation of your free Windows 10 upgrade differently and why we are not seeing Windows 10 product keys being distributed to activate the new installations. That initial upgrade is apparently a key element of the activation and validation process. I may be oversimplifying this but keeping it simple is usually the best option. The basic process is that when you perform an upgrade to Windows 10 over a genuine Windows 7 or 8.1 system an anonymous and unique hardware hash is generated that is based on your systems hardware configuration. Since it is anonymous that is why you do not have to use a Microsoft Account and this hardware hash is generated even if you choose to install Windows 10 with a Local Account. That same hardware hash is sent to Microsoft servers and a corresponding certificate is created to validate your systems activation status. From this point forward any future installs, including one where you delete all partitions and install Windows 10 from scratch, will be activated because of that unique hardware hash and the corresponding certificate. Since it is all stored on Microsoft’s servers there is no reason for us to keep a backup either. On both of the systems I mentioned earlier I accomplished this by first downloading the Windows 10 Installation Media creation tool from Microsoft and selecting Upgrade this PC option to begin an in place upgrade. The Windows 10 update that downloads from Windows Update using the Get Windows 10 app performs an in place upgrade as well. Just keep to the same edition and architecture as I mentioned in my second point earlier. For those of you worried about clean installs at this point there is an option with both of these methods to choose what you keep on your system – all of your files and apps, personal files only or nothing. Selecting nothing will give you a brand new activated Windows 10 install that does not contain any of your previous operating system in it – a clean install for all intents and purposes. Plus it is an upgrade that will create the hardware hash for activation now and in the future. After letting that upgrade run its course each of those systems were now properly activated with Windows 10. For most of you that will be the end of the upgrade road since you are activated with Windows 10. Your unique hardware hash has been created so in the future, if you have to reinstall Windows 10, you do not need to go backwards to Windows 7 or 8.1 and then to Windows 10 to be activated. However, for those of you interested in a clean install onto clean hard drives keep reading. Right after upgrading these same systems I grabbed my Windows 10 installation media USB drive and I performed the ultimate in clean installs on each of them by removing all of the system drive partitions. That meant no residue of my past installation of Windows 7, 8.1 or the upgrade to 10 were left behind. That also meant no activation certificate based on my hardware hash was left on the hard drive as well. I proceeded with the Windows 10 installation and anywhere it asked me for a product key I selected the Skip this step option to continue. You will go through the normal Out of the Box Experience (OOBE) through this to set some of your options including connecting to a network, using a Microsoft Accounts, setting a PIN and a few other items. Once I was in the fresh and clean Windows 10 install I headed into Settings>Update & security>Activation to find the system properly activated. That means my hardware, because it had not changed of course, generated the same hardware hash as before and subsequently allowed the system to be activated. Future hardware updates may require that you need to reactivate Windows 10 because the hardware hash will have changed but we used to do the same thing in Windows 7 and 8.1 so I expect that will be a similar process in Windows 10. Reactivation should also update your hardware hash for future installs and activations. This activation process should work for the lifetime of that device and allow you to reinstall Windows 10 if necessary without activation issues or the need for a product key. Source : winsupersite
-
- 29 july
- activation
-
(and 2 more)
Tagged with:
-
Microsoft flipped the switch on the Windows 10 upgrade right about midnight on July 28, 2015. I know this because my Windows 10 upgrade showed up at that time. I had just flown into NYC, sat through traffic due to a disabled vehicle in the Holland tunnel, and finally checked into the hotel when the upgrade showed up. The upgrade of my Surface Pro 3 took close to 2 hours, so I didn't get to sleep until about 2:30am. It doesn't take this long for everyone – it should only take an hour or so – but I was downloading over hotel Wi-Fi, which is notoriously slow no matter which hotel choose. Even though the upgrade kept me awake so long, I had no issues with the download and install. Waiting so long for my upgrade to finish I had plenty of time to watch the social network wires and quickly found several upgraders with issues, and the common thread was error 80240020. There's not much additional information given if you receive an 80240020 error, but it’s a notice that the Windows 10 download was either interrupted (unfinished) or corrupted. To fix this: Delete everything you find in C:\Windows\SoftwareDistribution\Download Reboot Restart the download by heading directly into Windows Update P.S. If the upgrade still doesn't work after following these steps, its likely you have an unknown issue with your network connection or hardware. In that case, use the new ISO tool to create an installation on actual media. Source : winsupersite
-
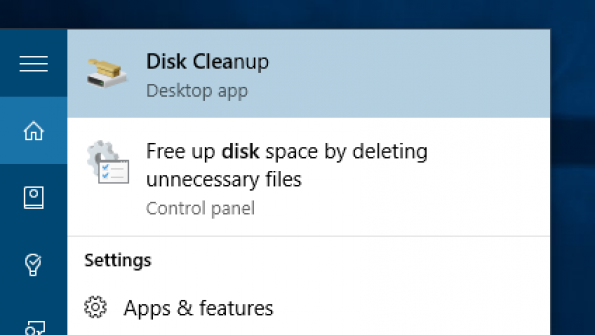
Yesterday I shared with you my recommendations for the first five things you should update and customize after installing your upgrade to Windows 10 after tomorrow’s general release. Once you have settled into your new Windows 10 installation and are satisfied with how everything works, you can do a simple maintenance task that will save you a significant amount of space on your device. This is not so much of an issue if you are on a desktop or laptop with a large hard drive however, on systems with small storage devices it can recover a few gigabytes of space which can be helpful. When your Windows 7 or 8.1 machine is upgraded to Windows 10 your Windows folder from the previous OS is stored on your hard drive in a folder named Windows.old. The files in this folder are used to revert back to your old OS if there is any issue in Windows 10 during the upgrade. If the upgrade goes well the Windows.old folder it is maintained so that you can revert back during the first 30 days after upgrading to Windows 10. I suspect that after the 30 day period this folder will be removed automatically or you could possibly be prompted to delete it. One thing is for sure – there is only a 30 day window to revert back to your previous OS. After that reverting back means reinstallation of your former version of Windows. So with all that known – once you have decided that your install of Windows 10 is good to go and you are satisfied then you can carry out this clean up task. The Windows.old folder cannot be manually deleted as it will result in an error since it is a system level folder. In order to remove it you must use the Disk Cleanup program on Windows 10. To do this click on the Search icon in the taskbar or tap the Windows key to open the Start Menu and just start typing Disk cleanup (1). You should see the Disk Cleanup program entry at the top of the search results (2). Click or tap the program name to start it. When the program window opens it defaults to the hard drive where your Windows installation is located. Click OK to begin the initial scan. After the initial scan is done you must then select the option to Clean up system files (1) and then begin the scan again by clicking OK. Once the scan is completed there are two main entries to look for. One you can delete the other you should retain. Let me explain. In these two screenshots, thanks to @LocalJoost & @jussipalo for the images, you can see an entry labelled Previous Windows installation(s). They are varying sizes because everyone’s install will be different based on software installed and your files. This is tied to the Windows.old folder I talked about earlier and you can click the box to the left of this entry and then click OK to remove Windows.old and free up all of that disk space. You will be prompted and warned that there is no turning back but you are ready to commit to Windows 10 anyway so click to confirm that. The system will go through the cleanup process and you will regain that disk space. The second entry in this list of space consuming files is the Temporary Internet Files. This can also take up varying sizes of disk space depending on the size of your Internet cache. Something else that is stored under the Temporary Internet Files area are any updates and new builds for Windows 10 that have been downloaded. They are stored there so that you can take advantage of the new Peer to Peer distribution of Windows Updates. As long as you keep the Temporary Internet Files on your machine those previously downloaded files will be shared amongst the computers on your network instead of each machine downloading them separately. This should save you a lot of bandwidth in the long run so do not remove these files using the Disk Cleanup tool. If you want to empty your browsers cache then use the tools in your web browser to delete those files and it will not impact the stored update files. Source : winsupersite
- 1 reply
-
- installation
- maintenance
-
(and 3 more)
Tagged with:
-
When you're trying to find that how-to, hands-on tutorial or FAQ, you don't want to have to scramble through a website's search results to get the information you need. Make your Windows 10 upgrade process and subsequent use smoother by keeping this page bookmarked; we'll be including all our Windows 10-related help here. * Windows 10 Upgrades or New Hardware: The Fine Print — What's the 411 from your favorite hardware manufacturers about both the upgrade and availability of new hardware with Windows 10 pre-installed? We took some time to research some of the top brands that are pretty common purchases and those you regularly find in retail stores. Windows 10 upgrade and installation FAQ: We figured out who pays and who doesn't — If you're a Windows 7 or Windows 8.1 user and you're looking to upgrade to Windows 10, there's no shortage of opportunities to be confused about whether or not you'll be paying for the upgrade, or when you have to start paying for upgrades. We're here to alleviate the confusion. Windows 10 Clean Install using the Media Creation Tool — One of the big questions over the last few months about the release of Windows 10 was clean installing onto a former Windows 7 or 8.1 system and retaining proper activation of the subsequent Windows 10 install. Here's how Richard Hay answered that question. This is a step-by-step guide with screengrabs. Windows 10 - Create install media or download ISO from Microsoft — If you understand the terms USB, ISO and installation media then you can jump the reservation line and begin your Windows 10 installation right now. This is a step-by-step guide with screengrabs. Enrolling in the Windows Insider Program post Windows 10 release — Why would you want to? Because Windows Insiders who have upgraded Windows 7 or 8.1 systems will have valid activated installations of Windows 10 with an option to enroll in the post release Insider program. Top 5 areas to update and customize after your Windows 10 upgrade — Once your upgrade to Windows 10 is complete you will arrive in the new OS ready to go with your compatible apps, programs and all of your files waiting for you. Take these five steps to begin your own Windows 10 experience with a machine that works perfectly for you. After the Windows 10 installation, the clean-up -- here's what to do ... Once you have settled into your new Windows 10 installation and are satisfied with how everything works, you can do a simple maintenance task that will save you a significant amount of space on your device. AND NOW, ALL OUR HOW-TOS How To: Require Ctrl-Alt-Del Logon for Windows 10 Why would you need to do this? Windows used to require the 3-finger salute (Ctrl-Alt-Del) to logon, you can re-enable that in Windows 10 to add an extra level of logon security. How To: Adjust Cortana's Settings in Windows 10 Why would you need to do this? Once you've enabled Cortana, you may want to adjust how she works. How To: Import Internet Favorites into Windows 10's Microsoft Edge from Other Browsers Why would you need to do this? Because you'll want to test out how Microsoft's new and radically improved web browser renders all your usual websites. How To: Configure Microsoft Edge to Open Multiple Home Pages in Windows 10 Why would you need to do this? You've got a lot of websites to look at but limited screen real estate. How To: Quickly Open Internet Explorer Pages in Microsoft Edge on Windows 10 Why would you need to do this? There will be instances where some Web pages will not show correctly in Edge. In this case, you might actually need to dust off Internet Explorer. How To: Add the Home Button Back to Microsoft Edge Why would you need to do this? Adding a Home button shortcut to the Edge browsers window makes it very easy to return to your browsers default home page. How To: Customize the Personalization Options in Windows 10 Settings Why would you need to do this? You want to know how to set up the Windows 10 background, colors, lock screen, themes and other options on the Start Menu. How To: Setup Quick Action Buttons in Windows 10 Why would you need to do this? Because the Windows Action Center is where you can set up shortcut access to your favorite/most used settings on Windows 10. How To: Secure Logon for a Windows 10 Tablet without a Keyboard Why would you need to do this? Let's say you're using something that doesn't have a keyboard and you want to bring up the logon screen that used to pop up with Ctrl + Alt + Del. How To: Use Windows 10's Screen Recording Utility Why would you need to do this? For those that want to do image and video capture on-the-cheap, Microsoft includes a screen recording utility in Windows 10's new Xbox app. How To: Turn the Desktop Background Image On and Off in Windows 10 Why would you need to do this? Maybe you want to turn off the background image altogether because it's just too distracting. How To: Use Quick Access in Windows 10's File Explorer Why would you need to do this? To provide easy access to your most common locations for files without having to drill down through different disk drives and folders. How To: Change How Windows 10 File Explorer Opens Why would you need to do this? To open up to the This PC view of your system instead of the Quick Access default. How To: Pin Websites to the Windows 10 Start Screen Why would you need to do this? To have quick and easy access to your most visited websites with one click from the Start Menu/Screen. How To: Give Titles to Windows 10 Start Screen Tile Groups for Better Organization Why would you need to do this? This helps you to quickly identify the common factor among the group of tiles. How To: Install the Windows Insider Hub on Windows 10 Why would you need to do this? If you are a member of the Windows Insider Program after the release of Windows 10 this app is no longer installed by default. This explains how to install it on your Windows 10 system so you can get program alerts from the Windows Team at Microsoft. How to: Create an email account in the Windows 10 Mail App Why would you need to do this? Almost everyone has at least one and usually multiple email accounts. This is how you add those extra ones to your system How To: Upgrade Windows 10 Home to Windows 10 Pro Why would you need to do this? With Windows 10 Microsoft is introducing the Windows 10 Pro Pack. The Pro Pack enables you to upgrade a Windows 10 Home system to Windows 10 Pro to take advantage of the increased features. How To: Stop the Windows 10 Upgrade from downloading on your system Why would you need to do this? There will be many people very excited about the prospect of upgrading to Windows 10 on the 29th of July. But if you're not one of them, you don't have to worry about Microsoft forcing the upgrade down your throat. Source : winsupersite
-
- bookmarked
- faq
-
(and 3 more)
Tagged with:
-
-
Choose to use this tool to directly upgrade the machine you are running it on or create installation media. 29 July 2015 means Windows 10 has arrived and Microsoft has made it easy for any users to create their installation media to install the new OS. This means if you understand the terms USB, ISO and installation media then you can jump the reservation line and begin your Windows 10 installation right now. You can access the 32 and 64 bit version of the media creation tool from https://www.microsoft.com/en-us/software-download/windows10 See the screenshots in this gallery for images of the process and what to expect. The following are needed to use these tools: An internet connection (internet service provider fees may apply). Sufficient data storage available on a computer, USB or external drive for the download. A blank USB or DVD (and DVD burner) with at least 4 GB of space if you want to create media. We recommend using a blank USB or blank DVD, because any content on it will be deleted. Source : winsupersite
-
- 29 july
- installation
-
(and 5 more)
Tagged with:
-
Dominate


